How to install VirtualBox Guest Additions on AlmaLinux 8 or 9 – LinuxShout
Home » How to install VirtualBox Guest Additions on AlmaLinux 8 or 9
How to install VirtualBox Guest Additions on AlmaLinux 8 or 9

Last updated: June 27, 2024 12:40 pm
4 Min Read

After installing AlmaLinux or any other operating system on Virtualbox, it not going to adapt the screen size automatically. Instead, you would have a scaled-down display which doesn’t give a good experience to users. Moreover, also some other features of VirtualBox such as Host to Guest drag and drop shared clipboard, and copy-paste will not work as well. To get these features along with the optimal performance for the Guest, we need to install VirtualBox Guest Additions ISO on AlmaLinux.
Contents
Well, VirtualBox already comes with an ISO file that can be easily mounted in Guest OS to install VirtualBox guest additions. However, it didn’t work properly on AlamLinux and gave us some Kernel errors, thus we have to install a few packages manually using EPEL.
VirtualBox Guest Additions installation on AlmaLinux 8/9
Advertisement
#1st Method:
Step 1: Add Epel Repository
Open the Command terminal and first-run system update command that is:
sudo dnf update
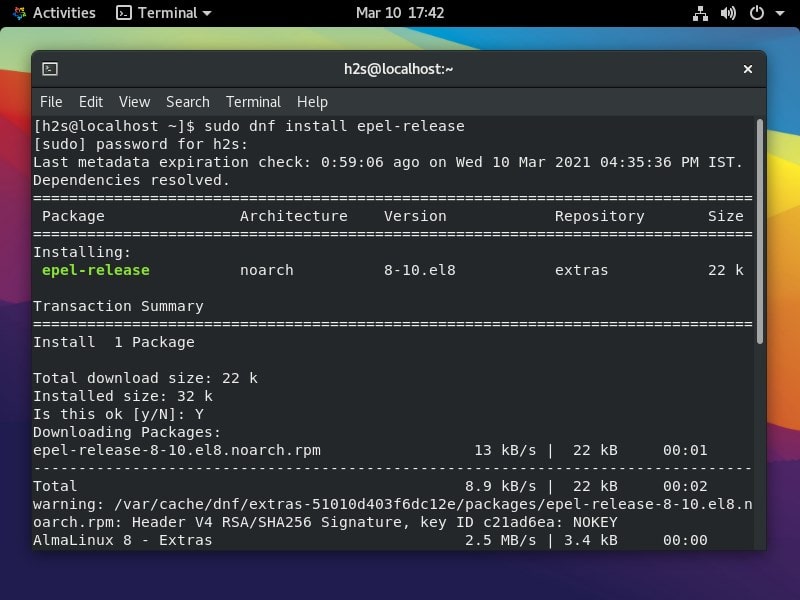
After that add the Extra Packages for Enterprise Linux, in short, known as EPEL using a simple command:
sudo dnf install epel-release
Step 2: Install Kernel headers and DKMS
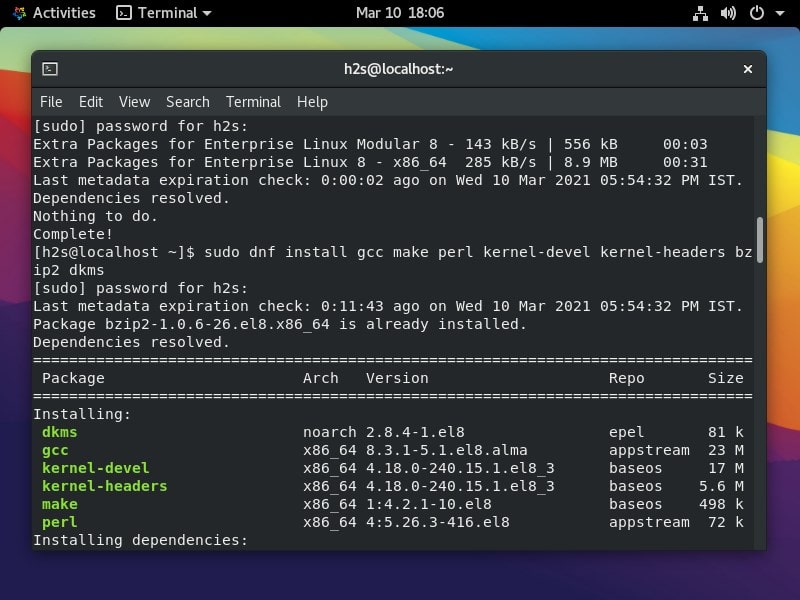
The next thing is with the help of the EPEL repository we will install several tools; kernel and DKMS (Dynamic Kernel Module Support) to build and install the Kernel module required to install the Guest Addition feature VirtualBox on AlmaLinux 8 distro.
sudo dnf install gcc make perl kernel-devel kernel-headers bzip2 dkms
Give your permission to install by typing Y and hitting the Enter Key.
Step 3: Update the Kernel
Advertisement
Although, the system will perform the update of the kernel automatically to make the changes, however, sometimes it may not. Thus, it is better to run the Kernel update command before restarting the system
sudo dnf update kernel-*
Step 4: Insert Install Guest Additions CD Image
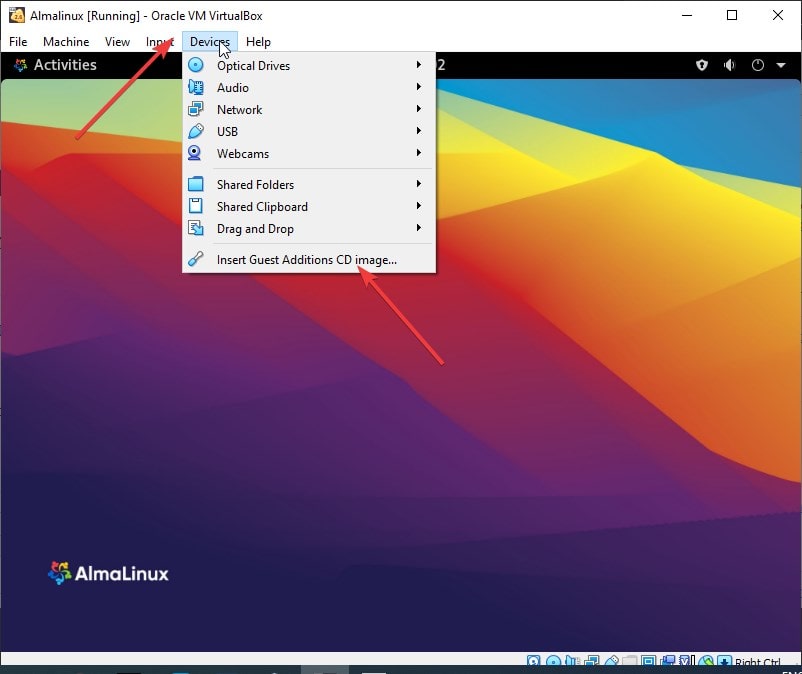
Go to the Virtualbox menu >> Device and then select the “Install Guest Additions CD Image…” option.
Step 5: Install VBoxLinuxAdditions.run
Now, in your terminal mount the CDROM that contains the script to install Virtual Guest Additions on AlmaLinux
sudo mkdir -p /mnt/cdrom
sudo mount /dev/cdrom /mnt/cdrom
cd /mnt/cdrom
sudo sh ./VBoxLinuxAdditions.run –nox11
Step 6: Enable Share Clip and Drag & Drop features
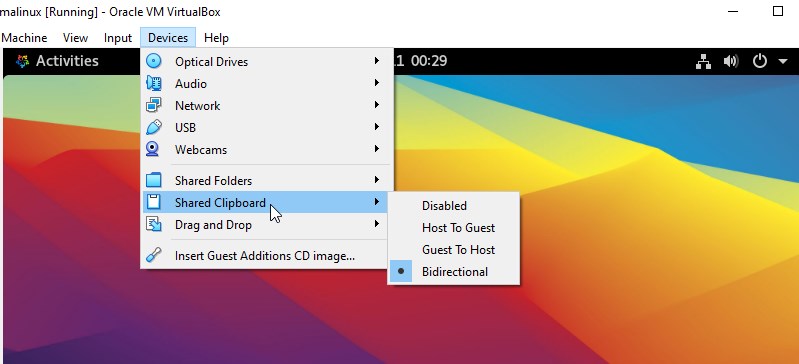
Click on the Devices given in the Oracle VirtualBox menu and then click Share Clipboard and select “Bidirectional“. In the same way, select Drag & Drop and choose the Bidirectional option.
Step 7: Restart the system
Advertisement
Finally, to apply the changes made by the Virtualbox Guest Additions and get its features on the Guest, simply restart the system. You can use the below command for that.
sudo reboot
#Second Method
- Click on the Devices menu of VirtualBox
- Select the “Install Guest Additions CD Image…” option.
- It will pop up to run the installation script. Just do that.
- In case, there is no pop-up, then go to File Manager.
- Select VBox GAS… CD from the left side bookmark area.
- Right-click at the blank space inside the area where CD files are listed.
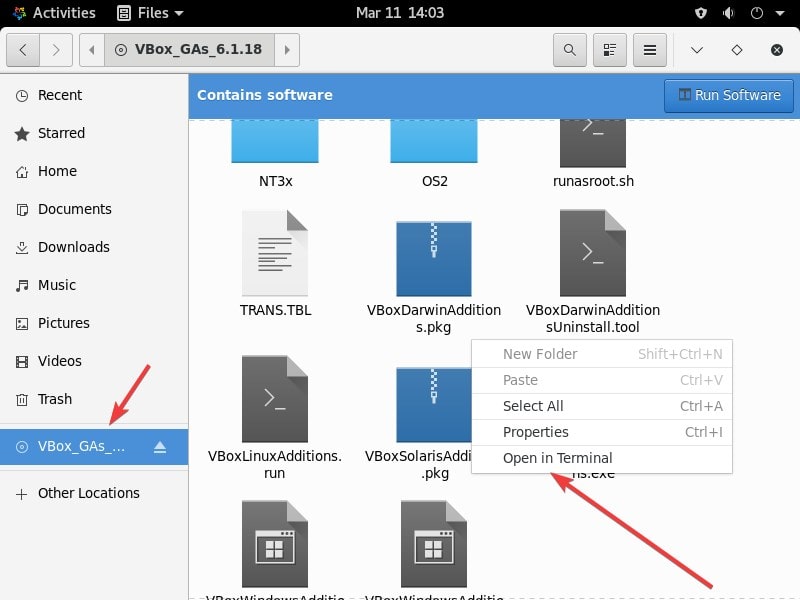
- Select Open Terminal.
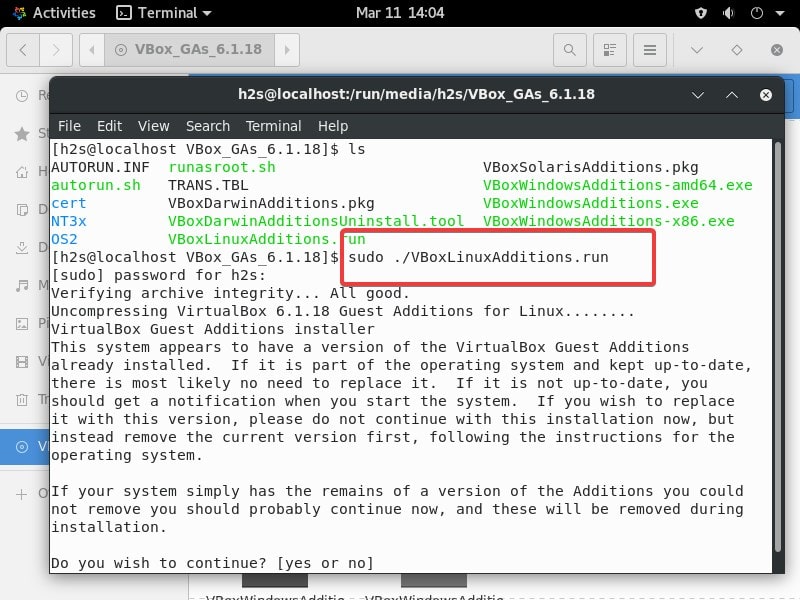
- Run – sudo ./VBoxLinuxAdditions.run
Comments are closed