Reinstalling the ShadowSnap Software
Kyle Mace
Last Updated: January 03, 2020 11:05
Topic
This article explains how to use Revo Uninstaller and PsExec to remove and reinstall the ShadowSnap software.
Do not use Revo Uninstaller to uninstall the Datto Windows Agent, Datto Mac Agent, or Datto Linux Agent. Unrecoverable system damage may occur. To uninstall these agents, please use their built-in uninstallers.
Environment
· ShadowSnap Agent
· Revo Uninstaller
· PsExec
Description
Revo Unistaller Pro is not always necessary, but we recommended it because it ensures all files and registry entries that are associated with the installation of ShadowSnap and ShadowProtect are completely removed.
An alternate but less-comprehensive method to remove ShadowSnap and ShadowProtect would be through the Add/Remove Programs wizard located in the Windows control panel.
Revo Uninstaller and PsExec are not supported by Datto, but they have produced reliable results.
This process requires several reboots of the production machine.
Prerequisites
1. Reboot the production machine.
2. After the reboot, verify that the following services are present and running:
· ShadowProtect Service
· StorageCraft Raw Agent
· StorageCraft Shadow Copy Provider
If any of these services are not present or in a running state, this is a sign of a corrupt ShadowSnap install. Follow the process described in this article to resolve the issue.
Procedure
Downloading and Installing Revo Uninstaller
Removing ShadowSnap
Removing ShadowProtect
Downloading and Installing Revo Uninstaller
1. Download and install Revo Uninstaller.
2. Launch the program. Locate ShadowSnap and ShadowProtect in the Revo UI.
1. Click Uninstall. Select ShadowSnap.
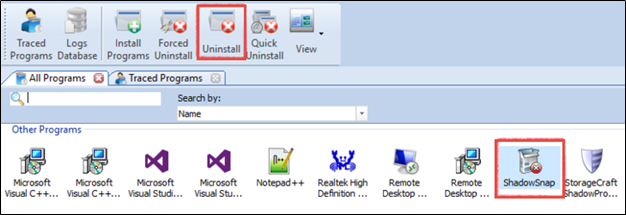
Figure 1: ShadowSnap icon, as seen in the Revo UI.
2. Revo Uninstaller will perform a full registry backup, and create a System Restore point.
3. The ShadowSnap uninstaller will launch. Click Next, and follow the prompts to uninstall the software.
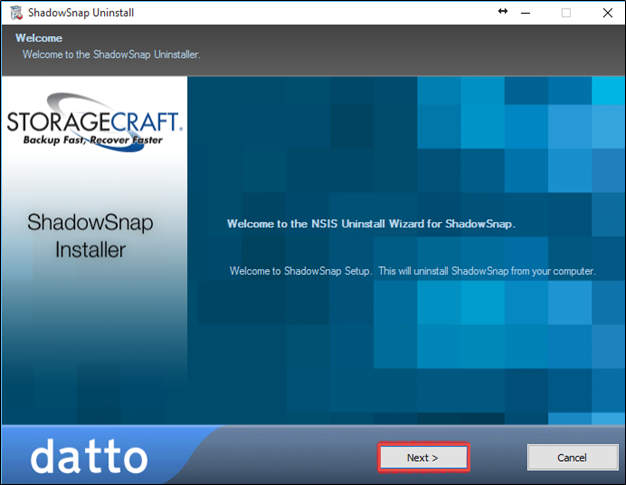
Figure 2: ShadowSnap uninstaller
4. When the uninstaller finishes, allow Revo to scan for any leftover files or folders, Select Moderate mode, and click Scan.
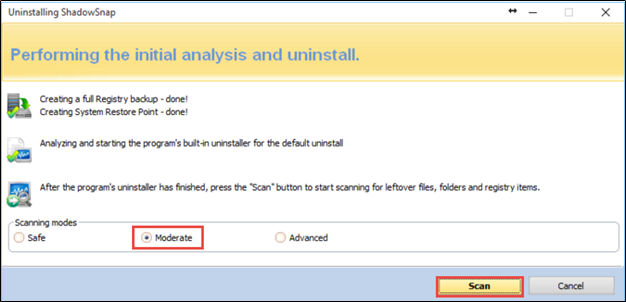
Figure 3: Scan mode selection
5. Review the leftover registry items. Click Select All, and Delete.

Figure 4: Found leftover registry items
6. When prompted, click Yes and then Finish.
1. Click the Uninstall button in the Revo GUI, and select StorageCraft ShadowProtect.

Figure 5: ShadowProtect icon, as seen in the Revo UI.
If you see the following error message, click OK:
"ShadowSnap is installed in the same location as StorageCraft ShadowProtect! Leftovers will be found from both applications! Carefully check the ones you want to remove!"
2. Revo Uninstaller will perform a full registry backup, and create a System Restore point.
3. The StorageCraft Maintenance Wizard will launch. Select Uninstall, and then click Next.

Figure 6: StorageCraft Maintenance Wizard
4. Click OK when the Deactivation Information window populates. This window notifies you that the uninstallation does not deactivate the product key or license.
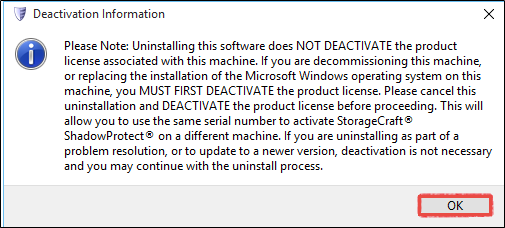
Figure 7: Deactivation Information
5. Click Next.
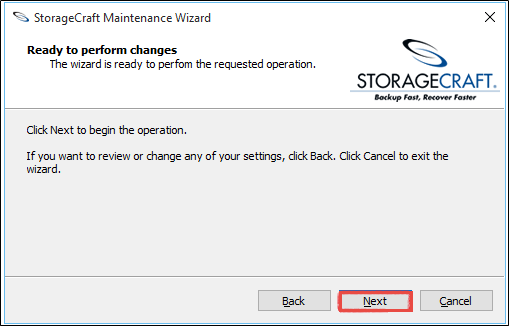
Figure 8: StorageCraft Maintenance Wizard in Ready mode
6. After the uninstaller runs, select No, I will restart my computer later. Click Finish.

Figure 9: StorageCraft Maintenance Wizard at task completion
7. Allow Revo to scan for any leftover files or folders, Select Advanced mode, and click Scan.

Figure 10: Scan mode selection
8. Review the leftover registry items. Click Select All, and Delete.

Figure 11: Found leftover registry items
9. Click Next. When prompted, click Yes and then Finish. If Revo finds any other leftovers after the cleanup, review the files, and remove them by clicking Selecting All and Delete.
10. Reboot the production machine to complete the uninstall.
Using PsExec To Install The ShadowSnap Software
Disable all antivirus software running on the production machine before running the ShadowSnap installer. This will ensure that the software installs correctly, and with all required permissions.
1. Download the full suite of PsTools software (about 1.6 MB) from Microsoft.
2. Download the ShadowSnap agent from this link.
3. Extract the zip file to the production machine’s desktop.
4. Make note of the path of the ShadowSnap installer.
5. Go to "Run" and type cmd to open a command window. If you are using domain accounts to install the ShadowSnap software, open the first command prompt using the Run As option, and uncheck the option to restrict access.

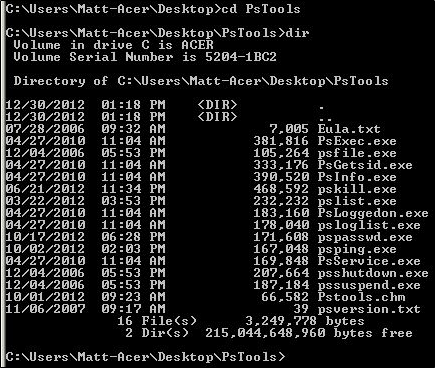
6. Navigate to the directory where you downloaded PsExec:
cd Desktop\PsTools
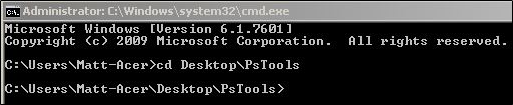
7. Type dir to list the contents of the directory to ensure that psexec.exe exists in this location.
8. Run the PsExec tool to invoke a new command prompt as the local system user.
psexec.exe -hsi cmd.exe

9. The second command prompt will open up at the system-level prompt. Use this new command window to browse to the location of the ShadowSnap installer.
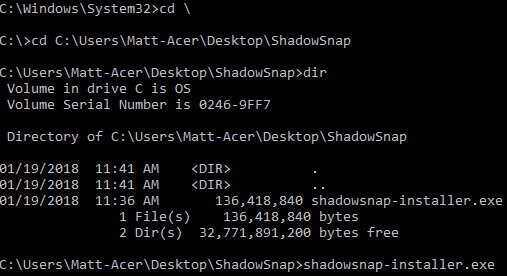
10. Run the ShadowSnap installer from the command line by typing the name of its executable file. In the above example, the name of the executable is shadowsnap-installer.exe.
11. When the installer finishes, reboot the production machine.
Comments are closed